
Not to make you panic, but there are only 24 more Saturdays until Christmas!!!
Ok, maybe the intention was to make you panic just a little. After all, I do want you to whip up a Christmas Stocking in July, know what I mean?

Last week we all gathered our supplies and made our gauge swatches! How did yours come out? Gauge isn’t totally critical to this project, so you can definitely allow yourself some wiggle room.
Every year the theme for July is “Christmas In July”. With only 5.5 months until Christmas morning, it’s a great time to get a head start on gifts and decor for everyone on your list. For the first time ever, I am offering a free pattern for the July CAL! This pattern combines two of my favorite things, tapestry crochet and stockings.
The Reindeer Stocking pattern will be released on the blog in 4 parts.
Week 1 – Materials and Gauge
Week 2 – Toe and Heel (released below!)
Week 3 – Reindeer
Week 4 – Cuff and Finishing
If you don’t feel like waiting 4 weeks for the full pattern, you can purchase an ad-free copy of the full pattern HERE.
Want to win some prizes!? Add your projects to the Ravelry listing. Check out this RAVELRY POST to learn how. Each week that you complete the steps and update your project is 1 entry into the Grand Prize!
Want the chance to win more? Join the Sincerely, Pam Facebook Community for even more ways to win!
>>> Add it to your Ravelry Favorites or Queue HERE <<<
>>> Pin It for later! <<<
Ready to start Part 2? Read on below!
TOE
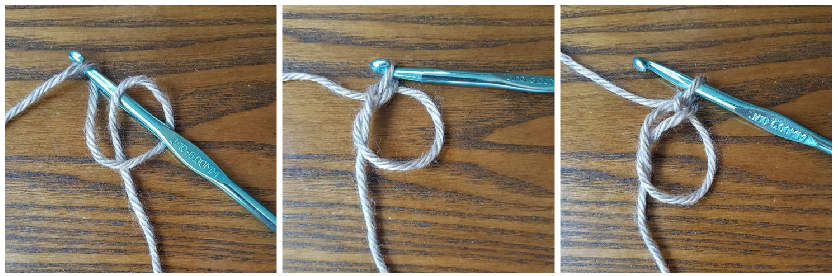
To begin with a Magic Circle, make a loop with your yarn, put your hook through the loop and grab the working yarn (Photo 1).
Pull the loop through the circle (Photo 2).
Ch1 (Photo 3).
1: Starting with Color (B) and a Magic Circle (see above), ch1, 12hdc in ring, join, pull gently to close. (12)
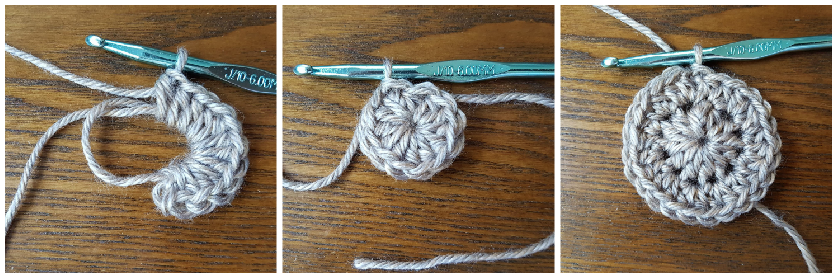
2: Ch1, 2hdc around, join. (24)
3: Ch1, *hdc in next 3, 2hdc in next, repeat from * around, join. (30)
4: Ch1, *hdc in next 4, 2hdc in next, repeat from * around, join. (36)
5: Ch1, *hdc in next 5, 2hdc in next, repeat from * around, join. (42 now and throughout)
6-7: Ch1, hdc around, join. Fasten off (B). Your project should now look like the photo above.
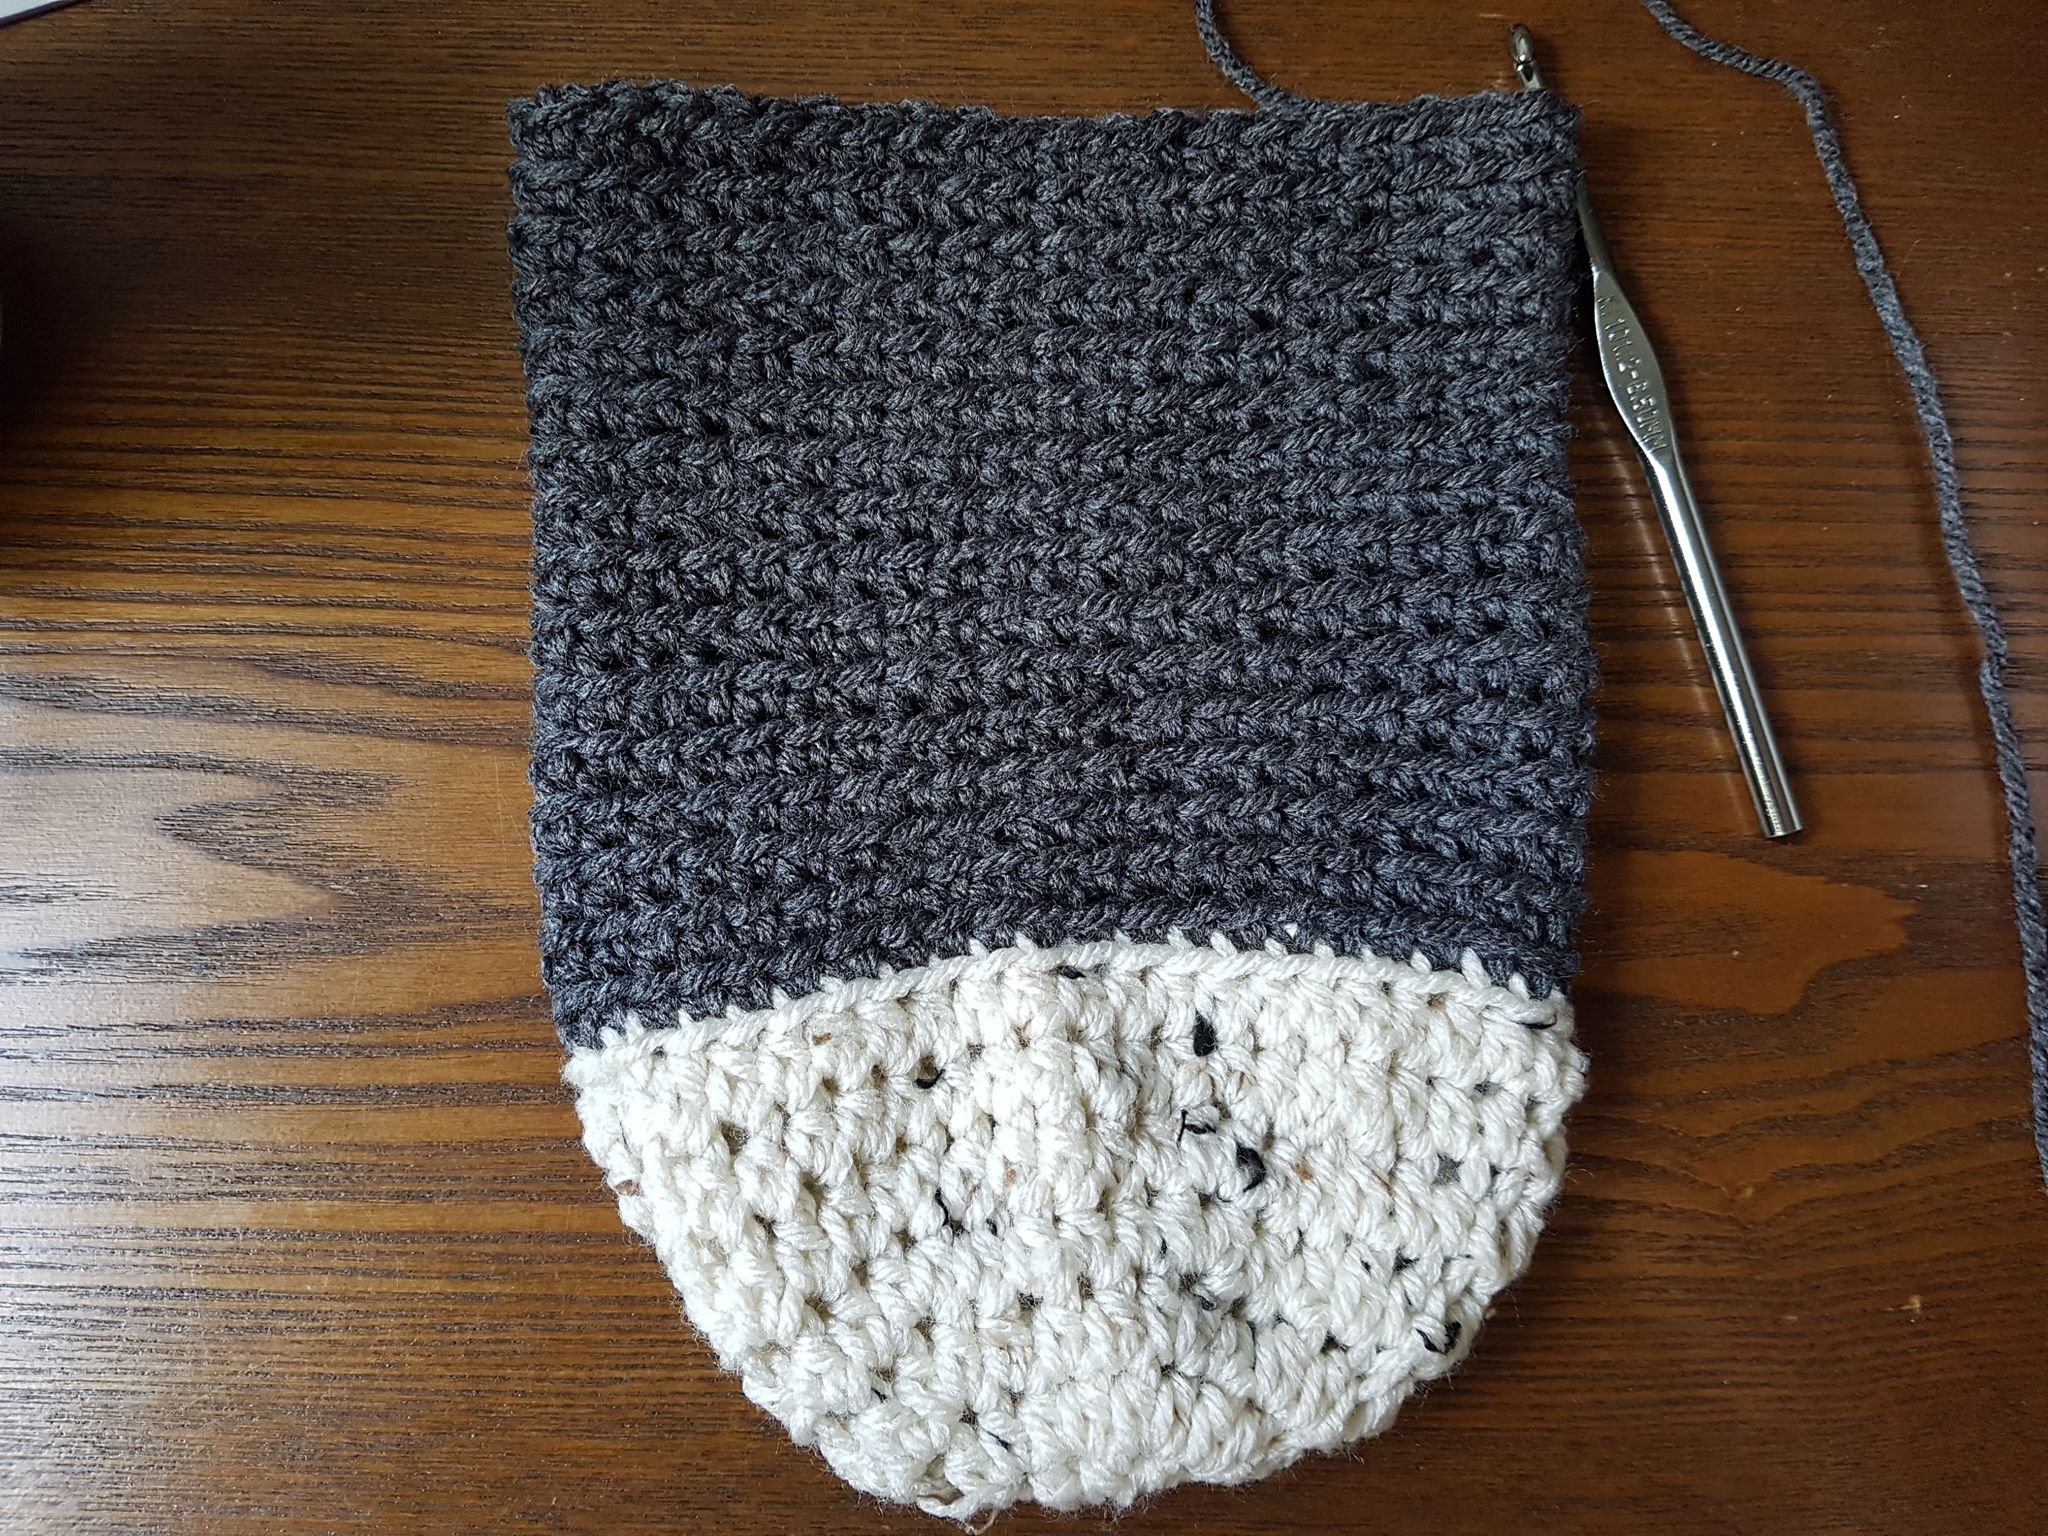
8-23: (A), ch1, working in the BLO, sc around, join. Fasten off (A)
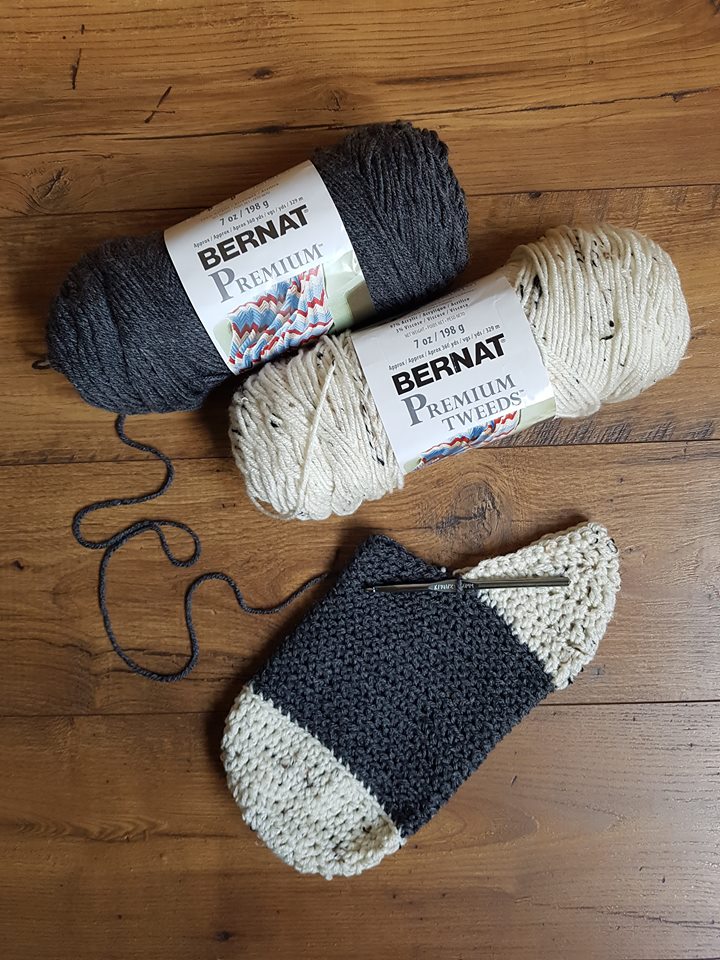
Whoops! You see that? My yarn changed. I learned not to keep a WIP on the couch the hard way. I woke up to see my dog was sick and used the Stocking as a toilet. Gross! So, in the trash it went, and I grabbed this yarn from my stash. I am now using Bernat Premium and Premium Tweeds for the sample. Alright! On we go!
HEEL
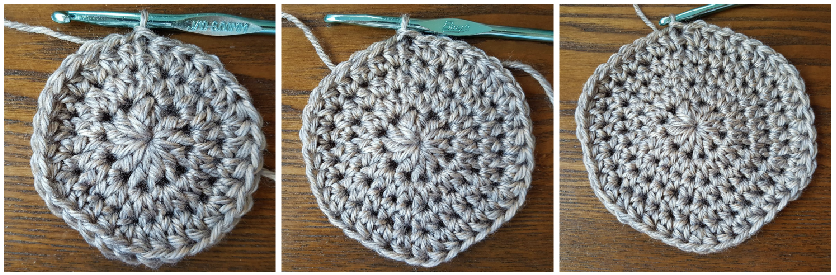
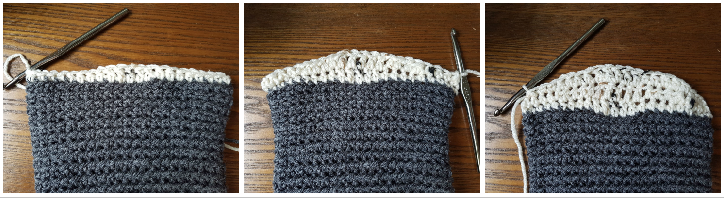
24: Reattach with (B) in same st as join, ch1, BLO, sc first 5, hdc next 4, dc next 5, hdc next 4, sc next 5. (23) First photo below.
25: Ch1, turn, working both loops for the remainder of the Heel), sk1st, sc next 4, hdc next 4, dc next 5, hdc next 4, sc next 3, sc2tog. (21) Second photo below.
26: Ch1, turn, sk1st, sc next 3, hdc next 4, dc next 5, hdc next 4, sc next 2, sc2tog. (19) Third photo below.
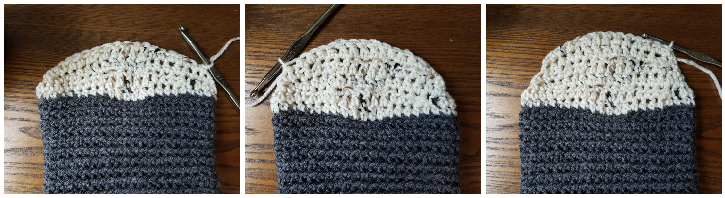
27: Ch1, turn, sk1st, sc next 2, hdc next 4, dc next 5, hdc next 4, sc next, sc2tog. (17) First photo below.
28: Ch1, turn, sk1st, sc next, hdc next 4, dc next 5, hdc next 4, sc2tog. (15) Second photo below.29: Ch1, turn, sk1st, hdc next 4, dc next 5, hdc next 3, hdc2tog. (13) Third photo below.
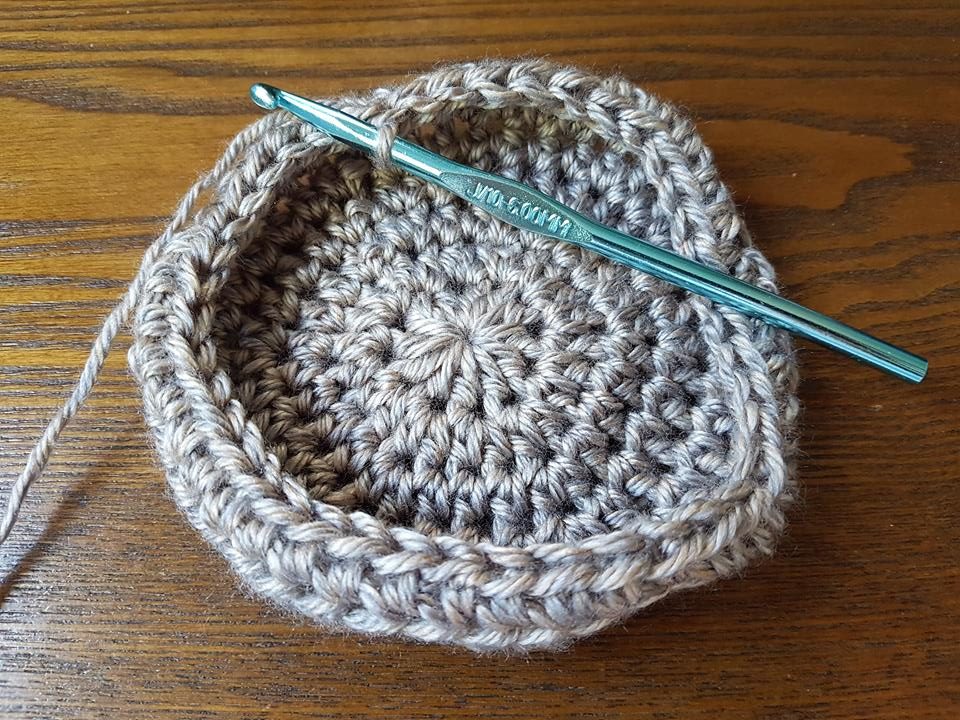
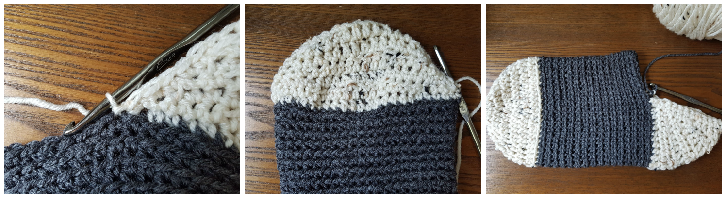
30: Ch1, turn, sk1st, hdc next 3, dc next 5, hdc next 2, hdc2tog, sc 6 sts evenly down the side of the Heel, slst to next unworked st of Row 23. (18, includes the slst) First photo below.
31: Ch1, turn. sc first 18 sts of Heel, sc 6 sts evenly down unfinished side of Heel, slst to next unworked st of Row 23. (25, includes the slst) Fasten off (B). Second and third photos below.
End of Part 2! Are you having fun? Enjoying the pattern so far?
Remember, if you don’t want to wait another week for Part 3, you can purchase the ad-free pdf HERE.
Skip to Part 3 HERE!
Why is there no Row 29? This is causing my seam to not be on the same side as the toe portion.
There is a Row 29, it’s just at the end of Row 30. I’m guessing I missed starting a new line. Sorry about that.