I know I’m not the only Mom who struggles with front entrance/foyer/mudroom organization. Or the hats and mitts that go to school, but never return. Or the soggy boots and other snow gear that never quite stay on the over-stuffed hooks. I may not be able to train your kids to hang up their things when they get inside (heck, I can’t get my own to do it!), but I can make it just a touch easier for them.
A few years back I was chatting in a crochet group on Facebook about crochet hacks, and this tip stuck out to me as being absolutely genius! Having small kids myself, and living in snow for 5 months of the year, I am no stranger to what my foyer looks like when the kids come in from the cold, or the number of hats and mitts we go throughout the Winter months.
>>> CLICK HERE TO SIGN UP FOR THE SINCERELY, PAM WEEKLY NEWSLETTER! <<<

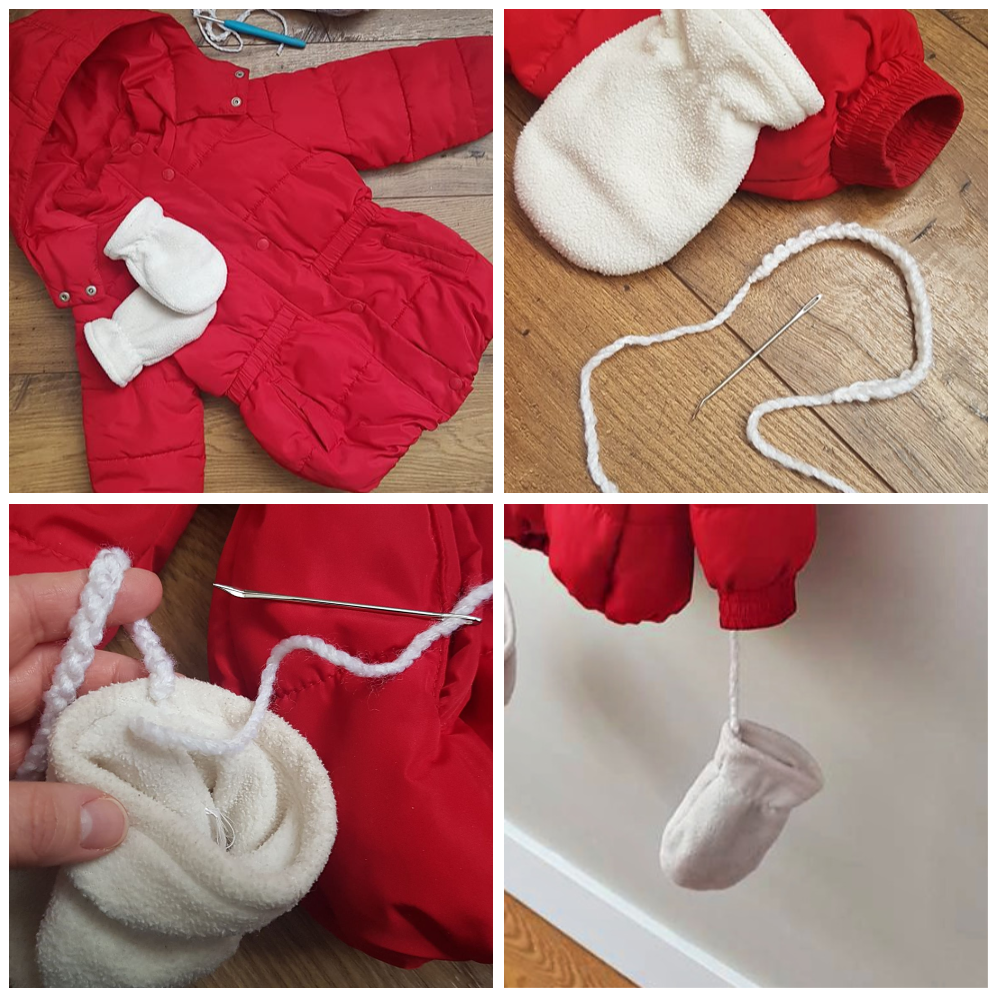
Ready to see just how easy it is!? First up, let’s take care of those mittens. My youngest is only 3, so I wanted to make sure that her mitts are on a short length of yarn. Nothing that she could get tangled in or wrapped around any body parts. I started with some bulky yarn from my stash. I had some Loops and Threads Barcelona left over from a project that matched nicely with her mitts (see first photo below). I chained 25, leaving a 6″ tail to start. I fastened off leaving another 6″ tail at the end (see second photo). Using a tapestry needle and one 6″ tail, I attached the chain to the inside of one mitten (see third photo). I then attached the second 6″ tail to the inside of her cuff (see fourth photo). I repeated this process for the other mitt/sleeve. This reminds me of what I used to have as a child, only my string went through one sleeve and out the other with a mitten on each end. Not something I would recommend for young kids, but definitely effective!
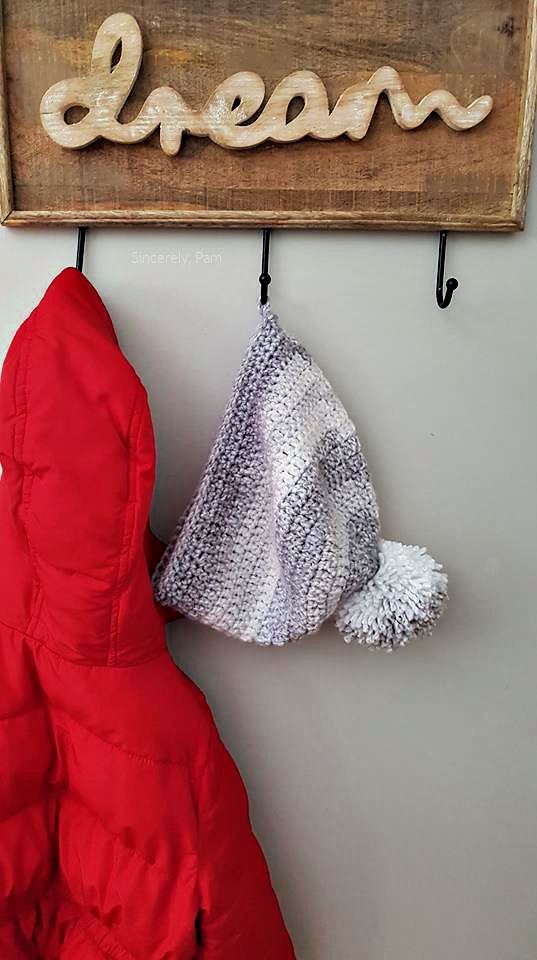
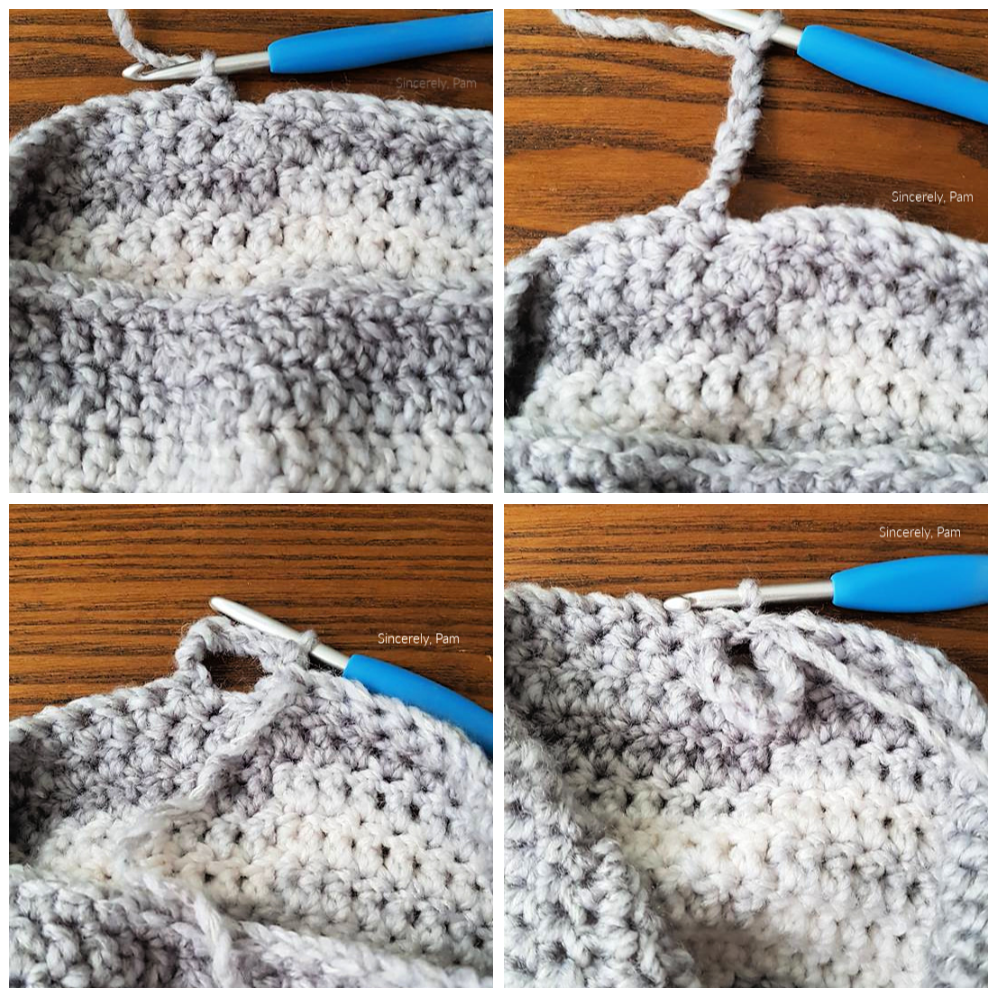
Next up is the Hat Hack! This one is so cool! When you are working the band of a hat, you will basically create a loop to hang your hat with, approximately 3 rounds before you finish. This will depend on what type of band you are making, and if your hat is made top down or bottom up, etc. I will show you how I did it with this top down hat. This is the 3rd last round of this crochet hat. For this particular hat, I had to sc around and join to the first stitch. I followed the instructions until right before the join (see first photo below). Next, I chained 6 (see second photo). Then I joined to the first stitch in that round (see third photo). The next round was also sc around and join. So when I did, I just pushed the ch6 to the inside of the hat, and pretended like it wasn’t even there (see fourth photo). Then I completed my last round of sc and fastened off. From the right side of the hat, you can’t see any difference. But on the inside, there is a handy little loop that kids will be able to hang on hooks. This will not only keep hats from slipping off of coat hooks, but allow that hats to hang to dry in the winter months.
What do you think? Are these tips ones that you already use? Do you have any crochet hacks that you like to use for your crochet accessories? Comment below and let us know!
Until next time, Friends!
Leave a Reply