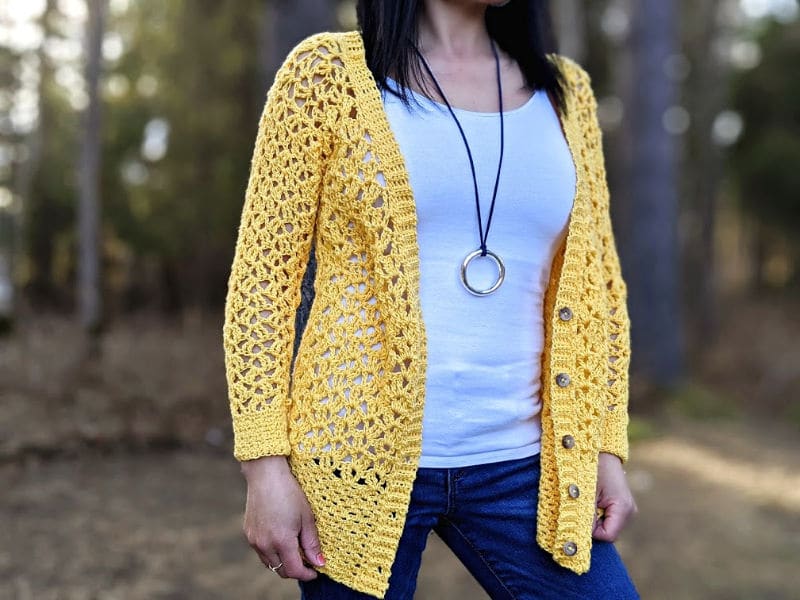
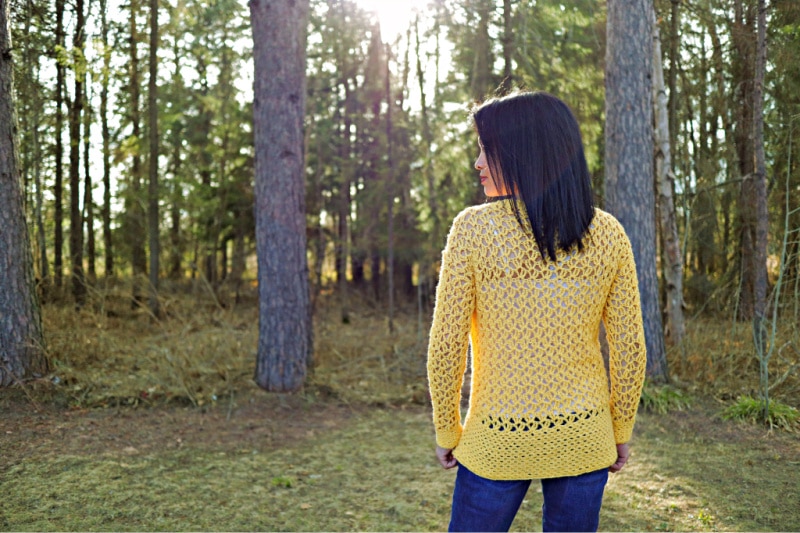
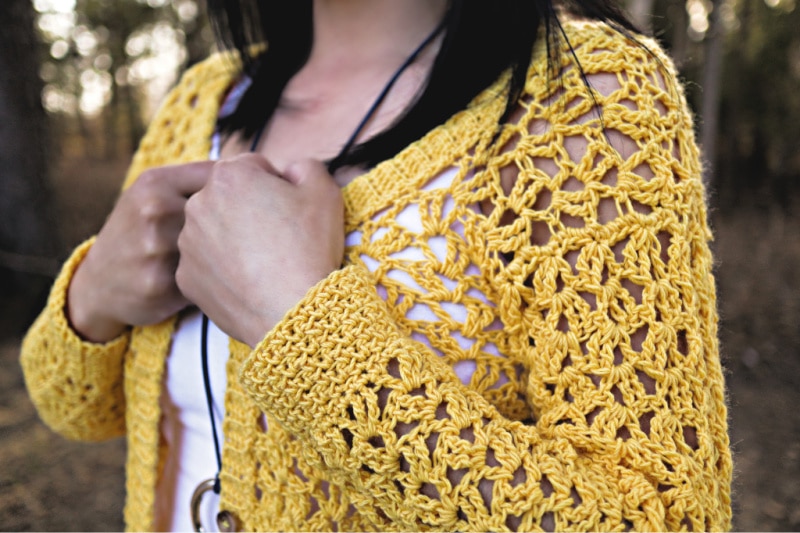
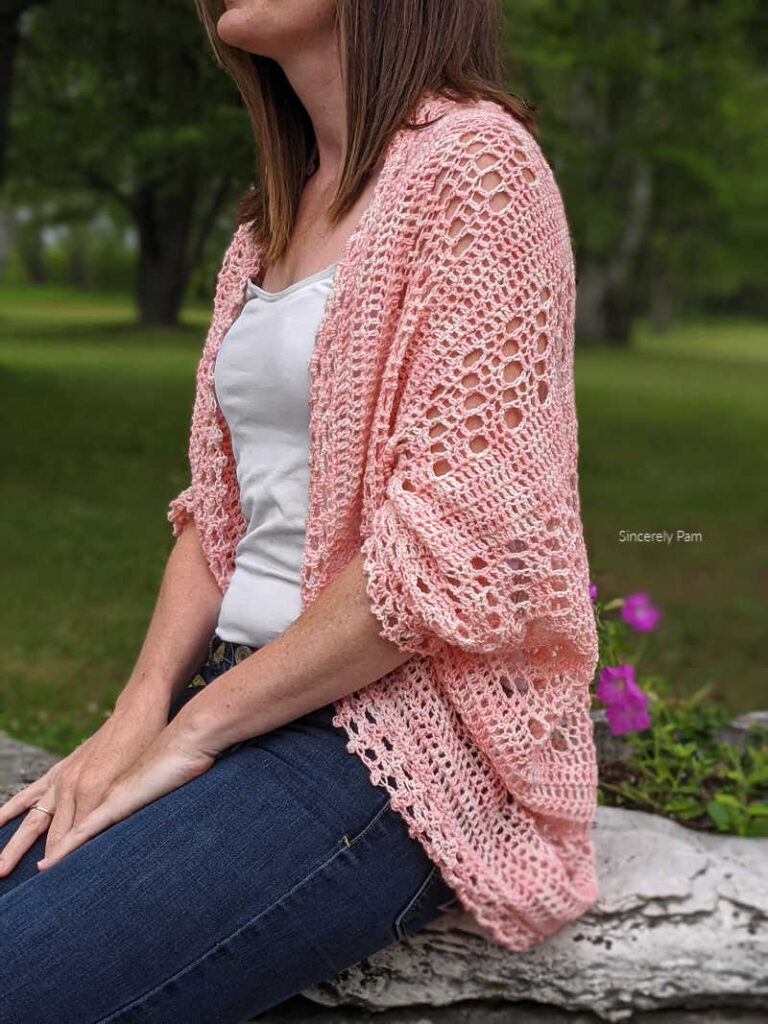
The Addy Lace Cardigan crochet pattern is a joy to wear, regardless of the season. The textured hem and cuffs provide great contrast to the airy, lace body. Although the buttons are functional, the ribbed button band polishes off this design beautifully. The bracelet length sleeves are tapered, giving a flattering shape.
This post contains affiliate links to products we recommend. We may receive a commission for purchases made through these links.
FURLS CROCHET CAL – Crochet Along
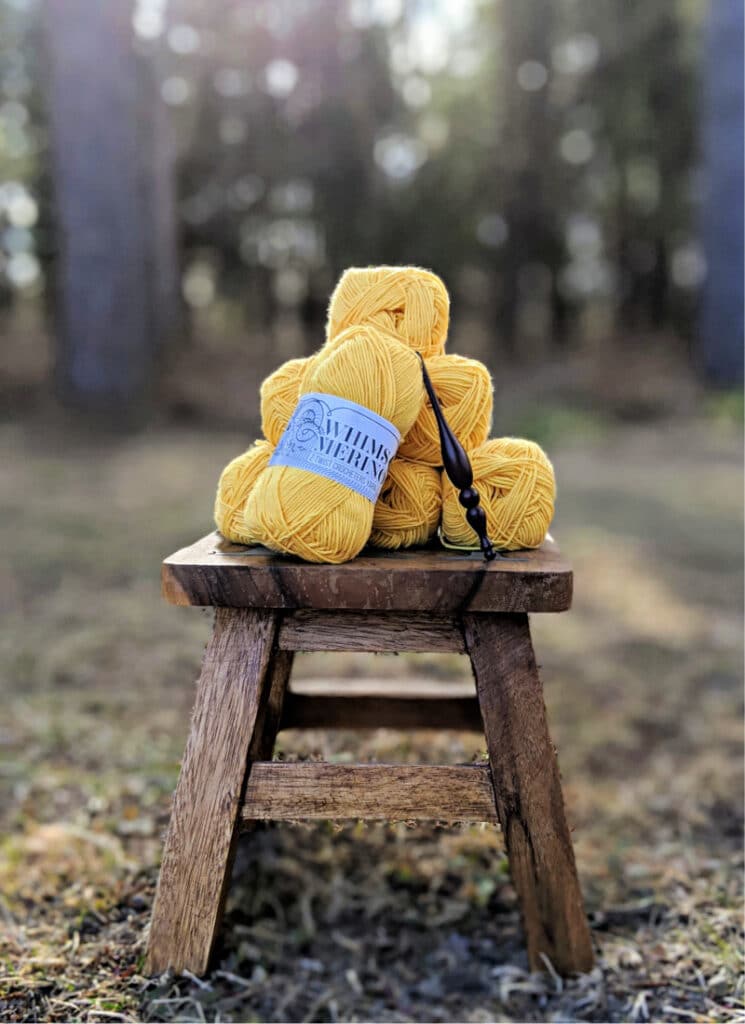
This pattern was written for the Furls Crochet May 2020 CAL. This was one of those instances where I was asked in November, yarn arrived in February, then I couldn’t say anything about it until May. These secret types of projects are so hard to keep a secret sometimes, you know?
Furls hosts a different CAL or KAL each month for their followers to make together. You can find all the details on their website, as well as join their Facebook Group for more fun!
THE YARN – Whims Merino Dk
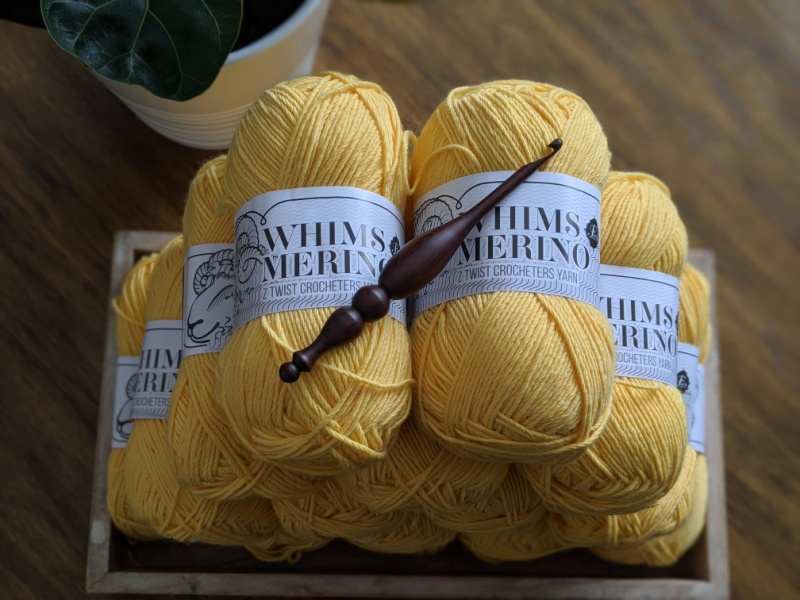
Sometimes I have a design in mind and then find the perfect yarn. Other times I see a yarn I love and know exactly what I want to make with it. This time, I had a pattern in mind, ordered the yarn, and then immediately changed that thought to something else. The Whims Merino told me exactly what it wanted to be, and I’m so glad I listened! It feels like it was made for the Addy Lace Cardigan crochet pattern.
This yarn is a favorite of mine! I first used it back in January when I designed the Ragged Falls Cocoon Shrug, and then again a few months later when I designed the Elmview Beanie. This yarn is a dream to work with!
YARN SPECIFICATIONS:
Whims Merino is a DK weight 50/50 blend of fine superwash merino + nylon. Each hank offers 100g (3.5oz), 94yds(180m) of silky-smooth deliciousness. Currently available in colours purple, red, blue, teal, pink, mustard, light grey, charcoal, and undyed. The best part of this yarn? It’s Z-Twist. Want to know the benefit to crocheters? Read Furls’ explaination on how zz twist yarn benefits crocheters.
Save 15% off your Furls Crochet order when you use coupon code SINCERELYPAM15.
MATERIALS
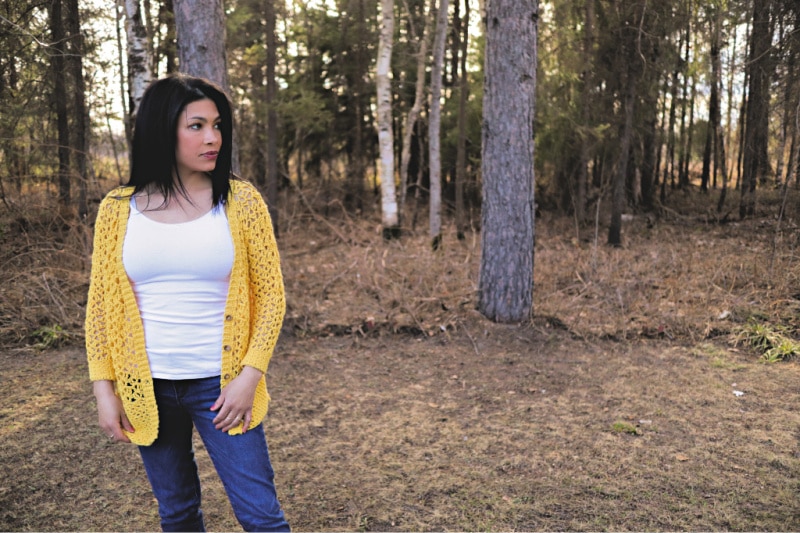
- Yarn: DK Weight #3 yarn. Sample shown was made with Furls Whims Merino DK in mustard.
- Hook: H (5.0mm). I used my Furls Alpha Series in Blackwood. Use coupon code sincerelypam15 to save 15% off your Furls Crochet order.
- Tapestry Needle for weaving in ends.
- Measuring Tape.
- 5 Buttons. Approx 9/16″ each. (These bamboo buttons are really cute!)
- Locking Stitch Markers (optional).
SIZE CHART
| SIZE | BUST | FINISHED BUST | LENGTH | APPROX YARDAGE |
| XS | 28-30″ | 34″ | 24″ | 800 |
| S | 32-34″ | 38″ | 24″ | 925 |
| M | 36-38″ | 42″ | 24″ | 1050 |
| L | 40-42″ | 46″ | 25″ | 1175 |
| 1X | 44-46″ | 50″ | 25″ | 1300 |
| 2X | 48-50″ | 54″ | 26″ | 1425 |
| 3X | 52-54″ | 58″ | 26″ | 1550 |
| 4X | 56-58″ | 62″ | 27″ | 1675 |
| 5X | 60-62″ | 66″ | 27″ | 1800 |
PATTERN KEY – Standard American terms
- beg: beginning
- ch: chain
- dc: double crochet
- sc: single crochet
- sk: skip
- sk1st: skip one stitch
- st(s): stitch(es)
- slst: slip stitch
- tr: treble crochet
SPECIAL PATTERN NOTES
The model is approximately 5’0″ tall, and is wearing the size Small cardigan. Although the pattern is written for the suggested lengths in the chart below, you can easily make the cardigan longer, or shorter, by adjusting the number of times you repeat Row 4. Just keep in mind that you will need to do the same to both the back and front panels.
Although this design was made using Whims Merino, you can substitute yarns in similar weights and fiber contents. Yarns used by testers and fans include Lion Brand Comfy Cotton, Lion Brand Flikka, and Sugar Bush Yarns Cabot. I think I might make another for Fall with a tweedy yarn, and WeCrochet City Tweed DK is calling my name!
This pattern is worked from the bottom hem up, in separate back, front left, and front right panels. They are quickly seamed together, and then the button band and sleeves are crocheted onto the body.
EXPERIENCE LEVEL
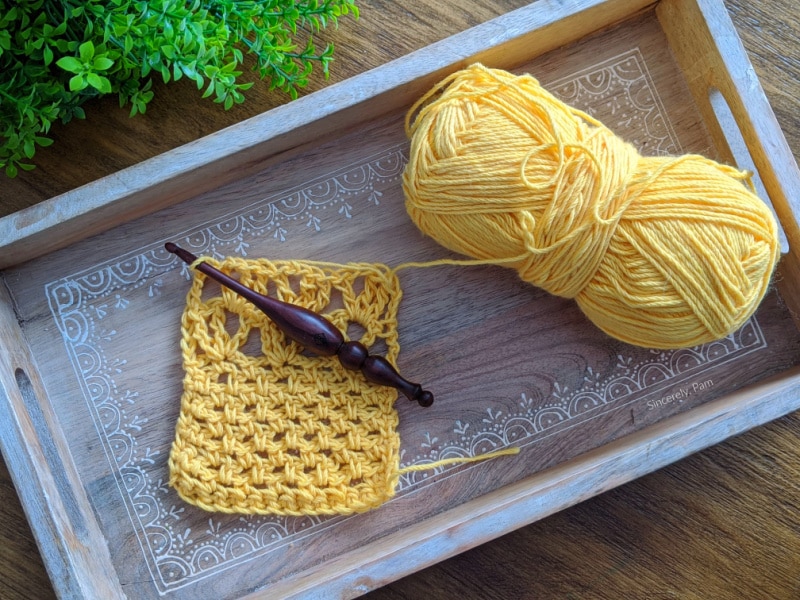
ADDY LACE CARDIGAN CROCHET GAUGE SWATCH INSTRUCTIONS
Gauge – Bottom Band and Cuffs:
Gauge is 7 (sc, ch2, sk1st) groups x 17 rows = 4″x4″
To make gauge swatch:
1. Ch20, sc in 2nd ch from hook, *ch2, sk1ch, sc in next ch, repeat from * across to last st, sc in last. (9 sc (sc, ch2, sk1st) groups)
2: Ch1, turn, sc in first st, *ch2, sk1st, sc in next ch2 space, repeat from * across, sc in last sc. [9 sc (sc, ch2, sk1st) groups]
Repeat Row 2 (17) more times.
Measure the 7 (sc, ch2, sk1st) groups in the middle of your swatch. Without fastening off, move on to the Lace Gauge.
Gauge – Lace:
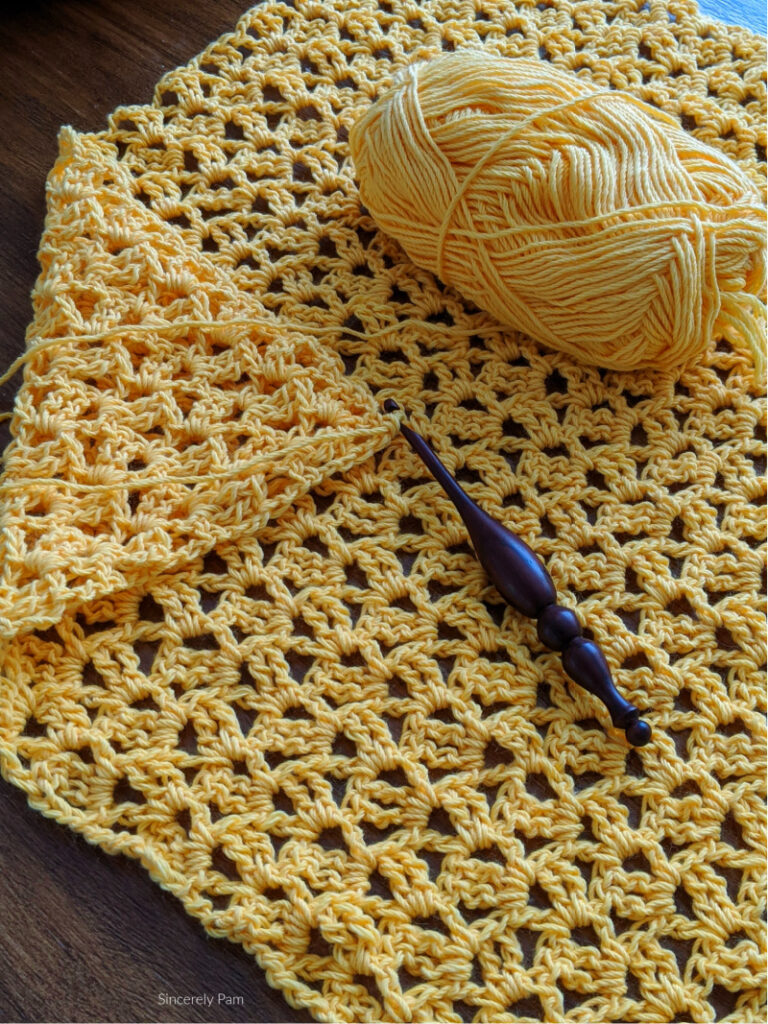
Gauge is 4 (2tr, ch2, dc) groups x 6 rows = 4″x4″
To make gauge swatch:
Continue to work this gauge after the last repeat of the Band and Cuff Gauge above. This is how the pattern repeats work in the pattern itself, and will make sure you end with the correct dimensions on each panel.
1: Ch4 (counts as tr), turn, sk1st, (2tr, ch2, dc in next ch2 space, *sk next ch2 space, (2tr, ch2, dc) in next ch2 space, repeat from * across, tr in last. (5 (2tr, ch2, dc) groups)
2: Ch4, turn, (2tr, ch2, dc) in each ch2 space across, tr in top of previous row’s beg ch4. [5 (2tr, ch2, dc) groups]
Repeat Row 2 until the lace is at least 4″ tall.
Again, measure the (2tr, ch2, dc) groups in the middle of your swatch for the most accurate numbers.
IF YOU PREFER TO WORK OFFLINE, YOU CAN PURCHASE THE AD-FREE PDF ON RAVELRY or ETSY!
ADDY LACE CARDIGAN CROCHET PATTERN INSTRUCTIONS
Although the instructions are written for the suggested lengths above, you can make the cardigan longer or shorter by adjusting the number of times you repeat Row 4. Just keep in mind you will need to do the same to the Front Panels as well.
BACK PANEL
1: Ch 61 (65, 73, 81, 89, 93, 101, 109, 117) sc in 2nd ch from hook, *ch2, sk1ch, sc in next ch, repeat from * across to last st, sc in last. (31, 33, 37, 41, 45, 47, 51, 55, 59 sc)
2: Ch1, turn, sc in first st, *ch2, sk1st, sc in next ch2 space, repeat from * across, sc in last sc. (31, 33, 37, 41, 45, 47, 51, 55, 59 sc)
Repeat Row 2 (17) more times, or until Back Panel reaches 5” tall when slightly stretched.
3: Ch4 (counts as tr), turn, sk1st, (2tr, ch2, dc) in next ch2 space, *sk next ch2 space, (2tr, ch2, dc) in next ch2 space, repeat from * across, tr in last. (32, 34, 38, 42, 46, 48, 52, 56, 60 tr)
4: Ch4, turn, (2tr, ch2, dc) in each ch2 space across, tr in top of previous row’s beg ch4. (32, 34, 38, 42, 46, 48, 52, 56, 60 tr)
Repeat Row 4 until entire piece measures desired finished length when stretched slightly. See Size Chart under the Materials list for suggested length per size.
Fasten off and weave in ends. Back Panel finished.
FRONT PANEL – MAKE 2
If you increased the length on the Back Panel, increase by the same number of rows by repeating Row 4.
1: Ch 25 (29, 33, 37, 41, 45, 45, 49, 53) sc in 2nd ch from hook, *ch2, sk1ch, sc in next ch, repeat from * across to last st, sc in last. (13, 15, 17, 19, 21, 23, 23, 25, 27 sc)
2: Ch1, turn, sc in first st, *ch2, sk1st, sc in next ch2 space, repeat from * across, sc in last sc. (13, 15, 17, 19, 21, 23, 23, 25, 27 sc)
Repeat Row 2 (17) more times, or until Front Panel reaches 5” tall when slightly stretched.
3: Ch4 (counts as tr), turn, sk1 st, (2tr, ch2, dc) in next ch2 space, *sk next ch2 space, (2tr, ch2, dc) in next ch2 space, repeat from * across, tr in last. (14, 16, 18, 20, 22, 24, 24, 26, 28 tr)
4: Ch4, turn, (2tr, ch2, dc) in each ch2 space across, tr in top of previous row’s beg ch4. (14, 16, 18, 20, 22, 24, 24, 26, 28 tr)
Repeat Row 4 (9, 9, 9, 10, 10, 10, 10, 11, 11, 11) times, or until entire piece measures (13”, 13”, 13”, 14”, 14”, 14”, 14”, 15”, 15”) tall when stretched slightly. You will now be decreasing on one side of the Front Panel.
If you increased the length on the Back Panel, make sure to repeat Row 4 on the Front Panels too!
5: Ch3 (does not count as a st), turn, tr in 1st ch2 space, (2tr, ch2, dc) in each ch2 space across, tr in top of previous row’s beg ch4. (12, 14, 16, 18, 20, 22, 22, 24, 26 tr)
6: Ch4, turn, (2tr, ch2, dc) in each ch2 space across, tr in the previous row’s first tr. (12, 14, 16, 18, 20, 22, 22, 24, 26 tr)
7: Repeat 5. (10, 12, 14, 16, 18, 20, 20, 22, 24 tr)
8: Repeat 6. (10, 12, 14, 16, 18, 20, 20, 22, 24 tr)
9: Repeat 5. (8, 10, 12, 14, 16, 18, 18, 20, 22 tr)
10: Repeat 6. (8, 10, 12, 14, 16, 18, 18, 20, 22 tr)
11: Repeat 5. (6, 8, 10, 12, 14, 16, 16, 18, 20 tr)
12: Repeat 6. (6, 8, 10, 12, 14, 16, 16, 18, 20 tr)
For Sizes 2X-5X ONLY: Repeat 5 and 6 one more time. (6, 8, 10, 12, 14, 14, 14, 16, 18 tr)
13-15: Ch4, turn, (2tr, ch2, dc) in each ch2 space across, tr in top of previous row’s beg ch4. (6, 8, 10, 12, 14, 14, 14, 16, 18 tr)
16: Ch4 (counts as tr), turn, (tr, ch2, dc) in same st as beginning ch4, (2tr, ch2, dc) in each ch2 space across, tr in top of previous row’s beg ch4. (8, 10, 12, 14, 16, 16, 16, 18, 20 tr)
17: Ch4, turn, (2tr, ch2, dc) in each ch2 space across, tr in top of previous row’s beg ch4. (8, 10, 12, 14, 16, 16, 16, 18, 20 tr)
Fasten off and weave in all ends.
SEAMING
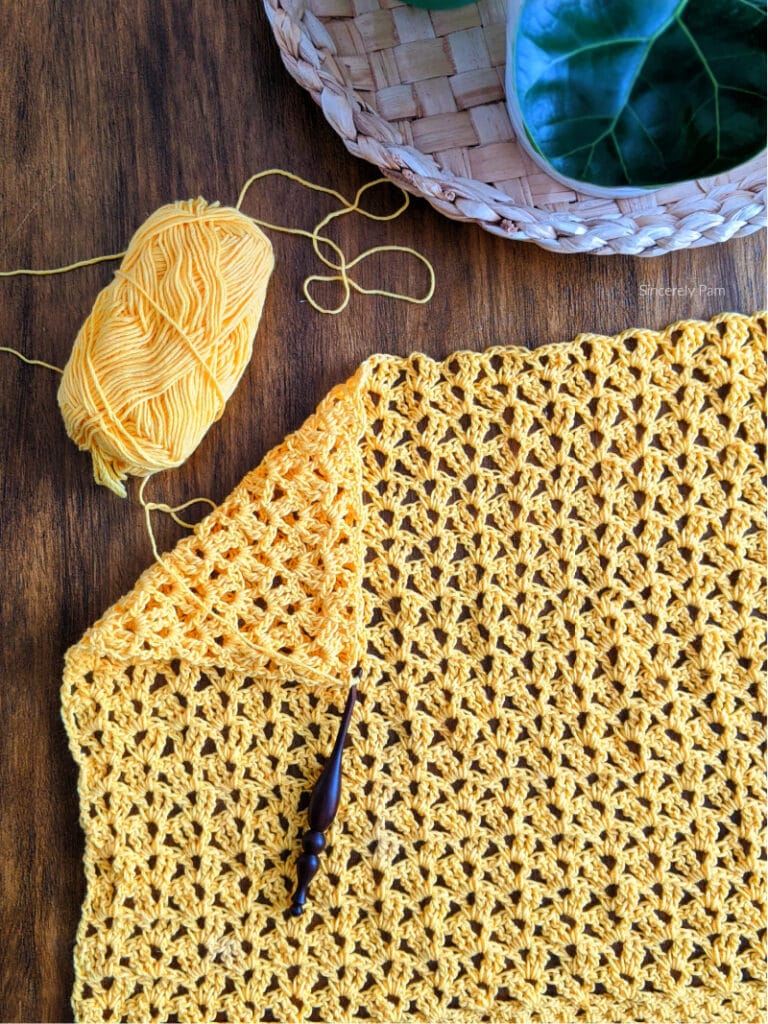
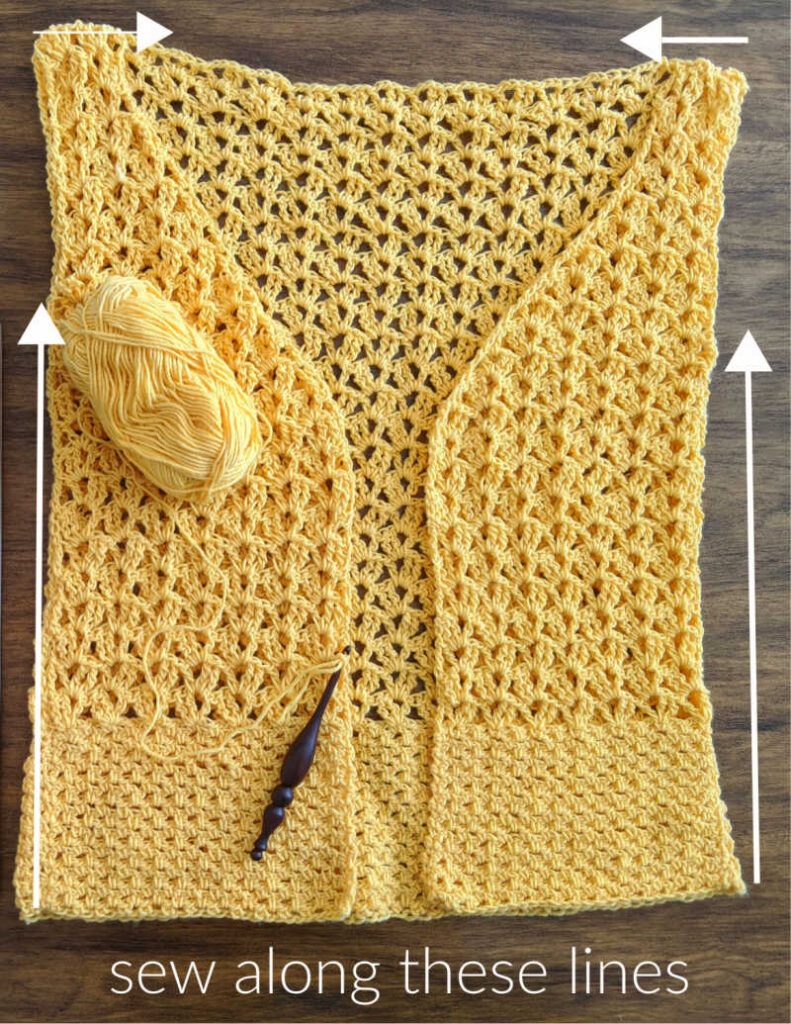
With a tapestry needle and yarn, carefully sew the Front Panels to the Back Panel using the photo as a guide. Check out THIS YOUTUBE VIDEO for some great tips on the mattress stitch.
First, sew evenly along the shoulder making sure you line up your stitches.
PRO TIP: You can use locking stitch markers to help keep your stitches lined up for more easier seaming.
Then the sew the sides together, leaving a (6.5”, 7”, 7.5”, 8”, 8.5”, 9”, 9.5”, 10”, 10.5”) Armhole opening for you to make the Sleeves.
Fasten off and weave in all ends.
BUTTON BAND
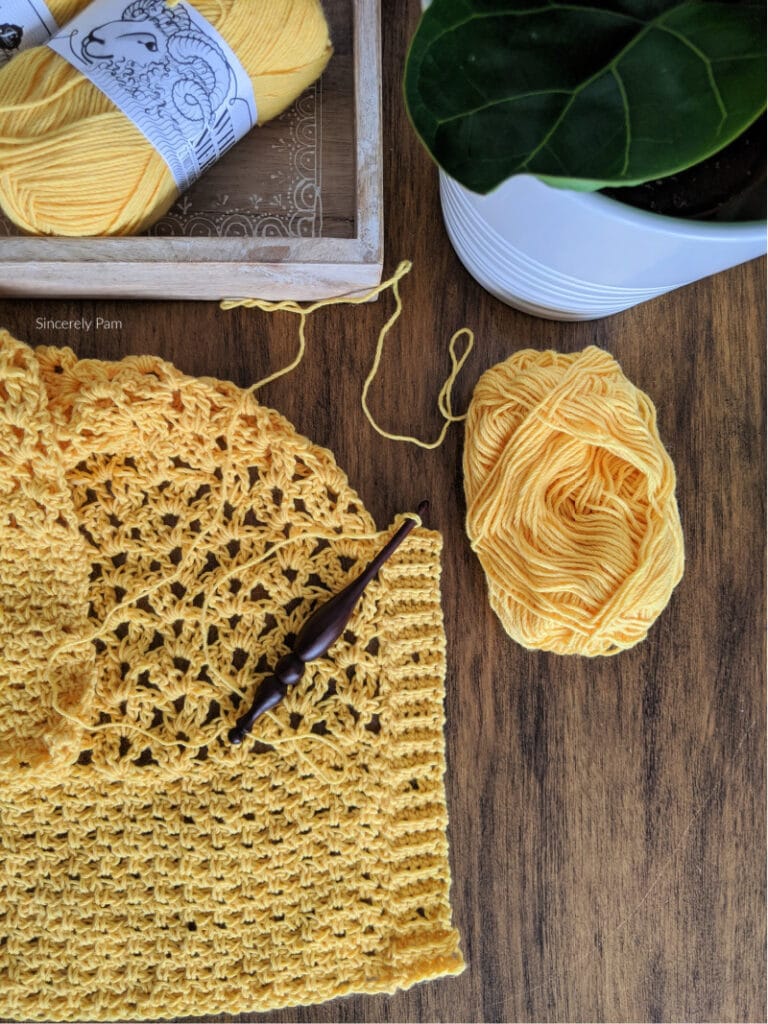
You are now going to crochet a ribbing around the front opening of the Cardigan. Place your slsts evenly spaced around so that you are not placing too many, or too few in each end row.
1: Reattach yarn to bottom left corner as shown in the photo., ch6, sc in 2nd ch from hook and across, slst to Cardigan. (5 sc) See photo below.
2: Slst to Cardigan, turn, working in the back loops only, sk 2 slsts, sc across. (5 sc)
3: Ch1, turn, working in the back loops only, sc across, slst to Cardigan. (5 sc)
4. Repeat Row 2.
5: Ch1, turn, working in the back loops only, sc 2, ch2, sk 1 st, sc 2, slst to Cardigan. (4 sc)
Button Hole made!
6: Slst to Cardigan, turn, working in the back loops only, sk 2 slsts, sc 2, sc in ch2 space, sc 2. (5 sc)
7: Repeat 3.
8: Repeat 2.
9: Repeat 3.
10: Repeat 2.
11: Repeat 3.
12: Repeat 2.
13: Repeat 3.
14: Repeat 2.
Repeat 5-14 four more times.
Repeat 5-6 one more time.
5 Button Holes made.
Continue to Repeat Rows 2 and 3 evenly around the Cardigan opening.
Fasten off and weave in ends.
SLEEVES
Want longer sleeves? You can increase your sleeve length by 2″ for every 3 additional rows.
I have noted where to repeat to increase the length by 2″. You can repeat as many times as you like to gain an additional 2″ in length.
Reattach yarn to bottom corner of Armhole opening.
1: Ch1, sc (48, 52, 56, 60, 64, 68, 72, 76, 80) evenly around the Armhole opening, join to first sc. (48, 52, 56, 60, 64, 68, 72, 76, 80 sc)
2: Ch4 (counts as tr), (tr, ch2, dc) in same st as beg ch 4, sk 3 sts, *(2tr, ch2, dc) in next, sk 3 sts, repeat from * around, join to top of beg ch 4. (24, 26, 28, 30, 32, 34, 36, 38, 40 tr)
3-4: Ch3 (does not count as a st), turn, (2tr, ch2, dc) in each ch2 space around, join to top of beg ch4. (24, 26, 28, 30, 32, 34, 36, 38, 40 tr)
Next is your first Decrease Round
5: Ch6 (counts as tr, ch2), turn, dc in ch2 space, (2tr, ch2, dc) in each ch2 space around to last ch2 space, tr in last ch2 space, join to 3rd ch in beg ch6. (22, 24, 26, 28, 30, 32, 34, 36, 38 tr)
6: Ch3 (counts as dc), turn, (2tr, ch2, dc) in each ch2 space around to last ch2 space, (2tr, ch2) in last ch2 space, join to top of beg ch3. (22, 24, 26, 28, 30, 32, 34, 36, 38 tr)
7: Ch4 (counts as tr), turn, (tr, ch2, dc) in first ch2 space, (2tr, ch2, dc) in each ch2 space around, join to top of beg ch4. (22, 24, 26, 28, 30, 32, 34, 36, 38 tr)
For a longer sleeve length, repeat Round 7 one more time.
8: Repeat 5. (20, 22, 24, 26, 28, 30, 32, 34, 36 tr)
9: Repeat 6. (20, 22, 24, 26, 28, 30, 32, 34, 36 tr)
10: Repeat 5. (18, 20, 22, 24, 26, 28, 30, 32, 34 tr)
11: Repeat 6. (18, 20, 22, 24, 26, 28, 30, 32, 34 tr)
12: Repeat 7. (18, 20, 22, 24, 26, 28, 30, 32, 34 tr)
For a longer sleeve length, repeat Round 12 one more time.
13: Repeat 5. (16, 18, 20, 22, 24, 26, 28, 30, 32 tr)
14: Repeat 6. (16, 18, 20, 22, 24, 26, 28, 30, 32 tr)
15: Repeat 5. (14, 16, 18, 20, 22, 24, 26, 28, 30 tr)
16: Repeat 6. (14, 16, 18, 20, 22, 24, 26, 28, 30 tr)
17: Repeat 7. (14, 16, 18, 20, 22, 24, 26, 28, 30 tr)
For a longer sleeve length, repeat Round 17 one more time.
18: Repeat 5. (12, 14, 16, 18, 20, 22, 24, 26, 28 tr)
19: Repeat 6. (12, 14, 16, 18, 20, 22, 24, 26, 28 tr)
20: Repeat 7. (12, 14, 16, 18, 20, 22, 24, 26, 28 tr)
For Sizes L – 2X ONLY! Repeat 5 and 6 one more time.
For Sizes 3X – 5X ONLY! Repeat 5 and 6 two more times.
Finished Stitch Count: (12, 14, 16, 16, 18, 20, 20, 22, 24 tr)
CUFFS
1: Ch1, turn, sc in each st and ch2 space around, join. (24, 28, 32, 32, 36, 40, 40, 44, 48 sc)
2: Ch1, turn, *sc, ch2, sk 1 st, repeat from * around, join. (12, 14, 16, 16, 18, 20, 20, 22, 24 sc)
3: Ch1, turn, *sc in ch2 sp, ch2, repeat from * around, join. (12, 14, 16, 16, 18, 20, 20, 22, 24 sc)
Repeat Round 3 until Sleeve measures approximately (16.5”, 17”, 17”, 17.5”, 17.5”, 18”, 18”, 18.5”, 18.5”) from underarm to cuff.
Fasten off and weave in ends.
Repeat on second Armhole.
FINISHING
Attach buttons to the cardigan by lining up to the buttonholes.
Gently block the cardigan. You can read my BLOCKING TUTORIAL on my blog for tips.
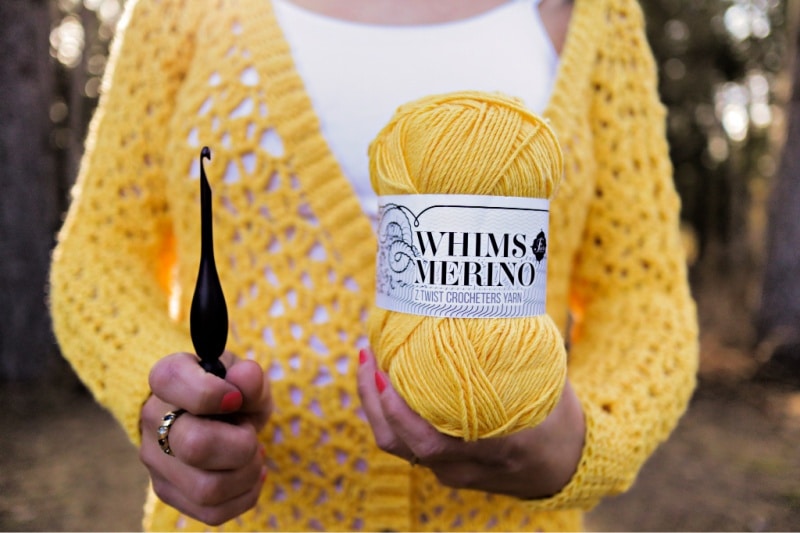
Save 15% off your Furls Crochet order when you use coupon code SINCERELYPAM15.
Don’t forget to share your progress photos in my Sincerely Pam Facebook Group, and tag me on Instagram! Use #addylacecardigan to be featured!
If you liked the Addy Lace Cardigan crochet pattern, try the Daphne Cocoon Cardigan, or the Beach Day Pullover next!

Such a pretty cardigan! And lovely color! 💖
Love this 😍It’s a beautiful pattern. I would love to make one using red color for the holidays.
This is an absolutely beautiful cardigan! And so great of you to make it size inclusive!
I’m almost done with my Addy Lace Cardigan! I ❤ this pattern!
Such a pretty pattern!!
It’s a beautiful cardigan! I’m thinking of making a matching set for me and my daughter:)
I love this! I am always cold (even mid summer) and this will be an amazing item to have in my closet when I get it made.
I L-O-V-E this cardi!!!
Beautiful cardigan pattern, love the lacy texture and all the sizes
Beautiful Addy Cardigan! It would make the perfect addition to any wardrobe!
What a beautiful cardigan design! I love the yellow!
Oh my goodness, this is beautiful! I definitely want to make one now! Bookmarked this page! <3
This is a beautiful cardigan. I can’t wait to make it to wear with all of my dresses. I might make a neutral in remembrance if my favorite sweater when I was 10.
LOVE LOVE LOVE THIS! Our winters don’t get extremely cold and this will be perfect amount of coverage for most days as well as looking awesome. Thank you so much!
Love this cardigan!
I love this pattern and the colour! The yellow is beautiful. I have also never used a furls hook and it would be cool to try the pretty pink one!
This is going on my list of “have to make”
Lovely pattern. Made it for my friend to wear and it was such a simple and fun make.
I love how light and airy this looks 😍
I have been wanting a sweater that is cool enough and classy enough to wear to work. I can’t wait to try making this cardigan!
Beautiful color!! this cardigan makes me feel like it’s summer all year round